Old, meet New
The OpenPedal Journey
Welcome to my ongoing exploration of reviving and reimagining a piece of musical history — an 18th-century single-action pedal harp that most recently appeared in Apple TV’s Dickinson series.
This beautiful old harp has made its way to my workshop not for a traditional restoration, but as the foundation for something new: Project OpenPedal — an open-source platform focused on making pedal harp mechanics more accessible, modular, and lower cost.
It’s equal parts preservation, experimentation, and innovation — and it’s very much a work in progress.
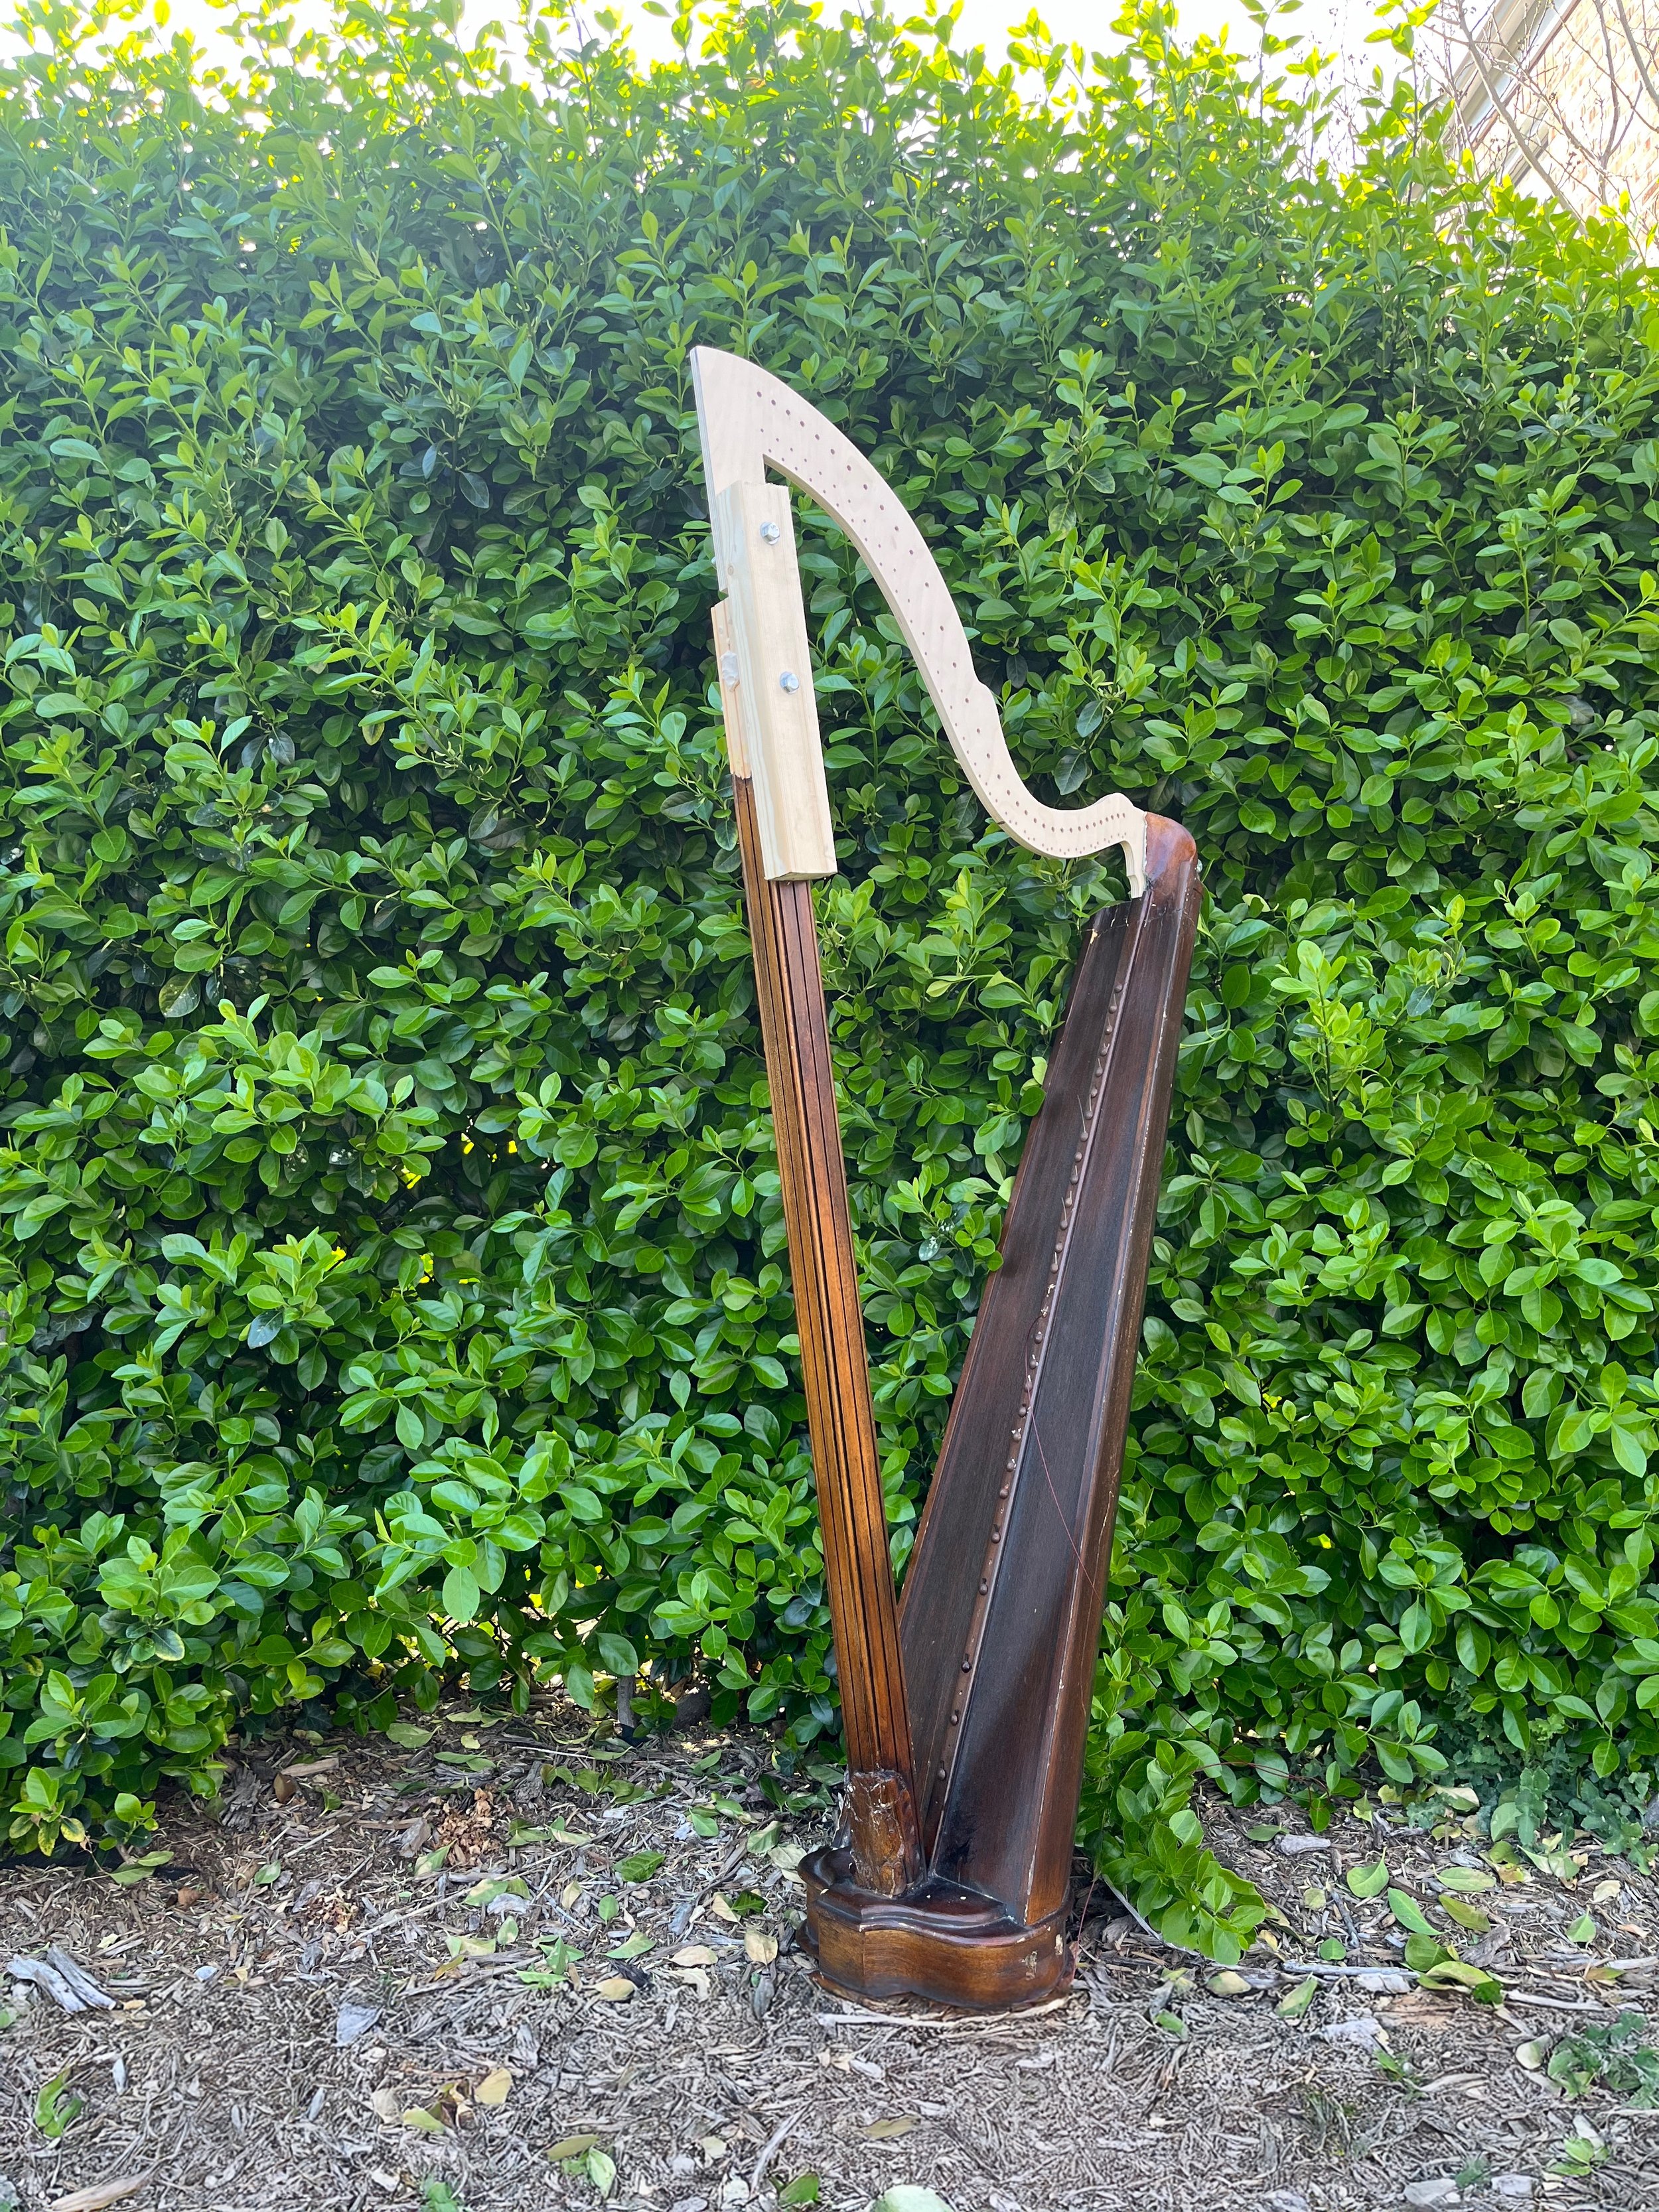
The current neck of the harp presents its own challenges. At some point in its history, the original was replaced with what I can only describe as a "furniture grade" substitute - a roughly carved piece of pine that appears to have been fashioned from standard dimensional lumber and covered with wood filler. This replacement lacks both the structural integrity and the sound quality of the original. Fortunately, this means I can approach the mechanical testing and modifications without concern for damaging irreplaceable historical elements, as the neck will ultimately be reconstructed out of maple and carbon fiber.
The precision of this electronic approach has been remarkable, allowing me to seamlessly adjust tension of the middle C string through an impressive range, from a "B" all the way to an "F." This successful proof of concept not only validates the electronic approach but suggests exciting possibilities for expanding the instrument's tonal range beyond what would have been possible with period-accurate and other modern mechanics.
Currently, I'm in the experimental phase of component selection, testing various servo brands to identify the optimal combination of size, speed, torque, and—perhaps most importantly for a musical instrument—noise level. The ideal servo must be compact enough to fit discreetly within the harp's neck, powerful enough to reliably tension the strings, responsive enough for immediate note changes, sensitive enough to understand 2000+ positions, yet quiet enough not be heard over the plucking of the strings. This balance of technical requirements presents a fascinating engineering challenge within the context of historical instrument restoration.
While refining the design for a single pedal, I also began modeling the base of the instrument in CAD to prepare for eventually fitting everything together. Unfortunately, there was a thin plywood cover attached to the bottom — glued and screwed — that had to be removed before I could proceed.
This instrument was chosen because, while it presents beautifully, it’s far from intact. Nearly all of the original action components are missing, and much of the existing woodwork is incorrect or has been replaced with non-original parts that now need to be remade. The goal isn’t to return this harp to its exact historical form. Instead, it’s serving as a foundation for prototyping a modernized pedal system — one that could expand access for musicians with physical limitations, and introduce new possibilities like quarter-tone tuning through electronically controlled mechanics.
The motorized the controller system, represents a significant departure from traditional pedal harp mechanics. For this first revision, I've implemented all-metal geared hobby servos as the driving force behind the mechanism. Though positioned too low on the neck for final implementation—these servos have proven instrumental in answering my fundamental question: "Can electric motors effectively activate a 'crochet' mechanism in place of the traditional mechanical rods found in standard pedal harps?" The results have been nothing short of spectacular—a reverberating yes! In fact, initial testing revealed that the system worked with unexpected efficiency, requiring me to significantly reduce the servo angles to achieve proper control.
The brain of this project centers around the Arduino R1 GIGA, a powerhouse microcontroller that orchestrates the harp's electronic pedal system. Finding a way to precisely control servos has been a challenge (the original project used stepper motors but their size was just too large). The current control mechanism utilizes a network of micro switches—three per pedal—to accurately detect the pedal's position (flat, neutral, or sharp). This positional data feeds into a custom script, which then references the Pulse Width Modulation (PWM) values to command the servos to the exact angles required for each note.
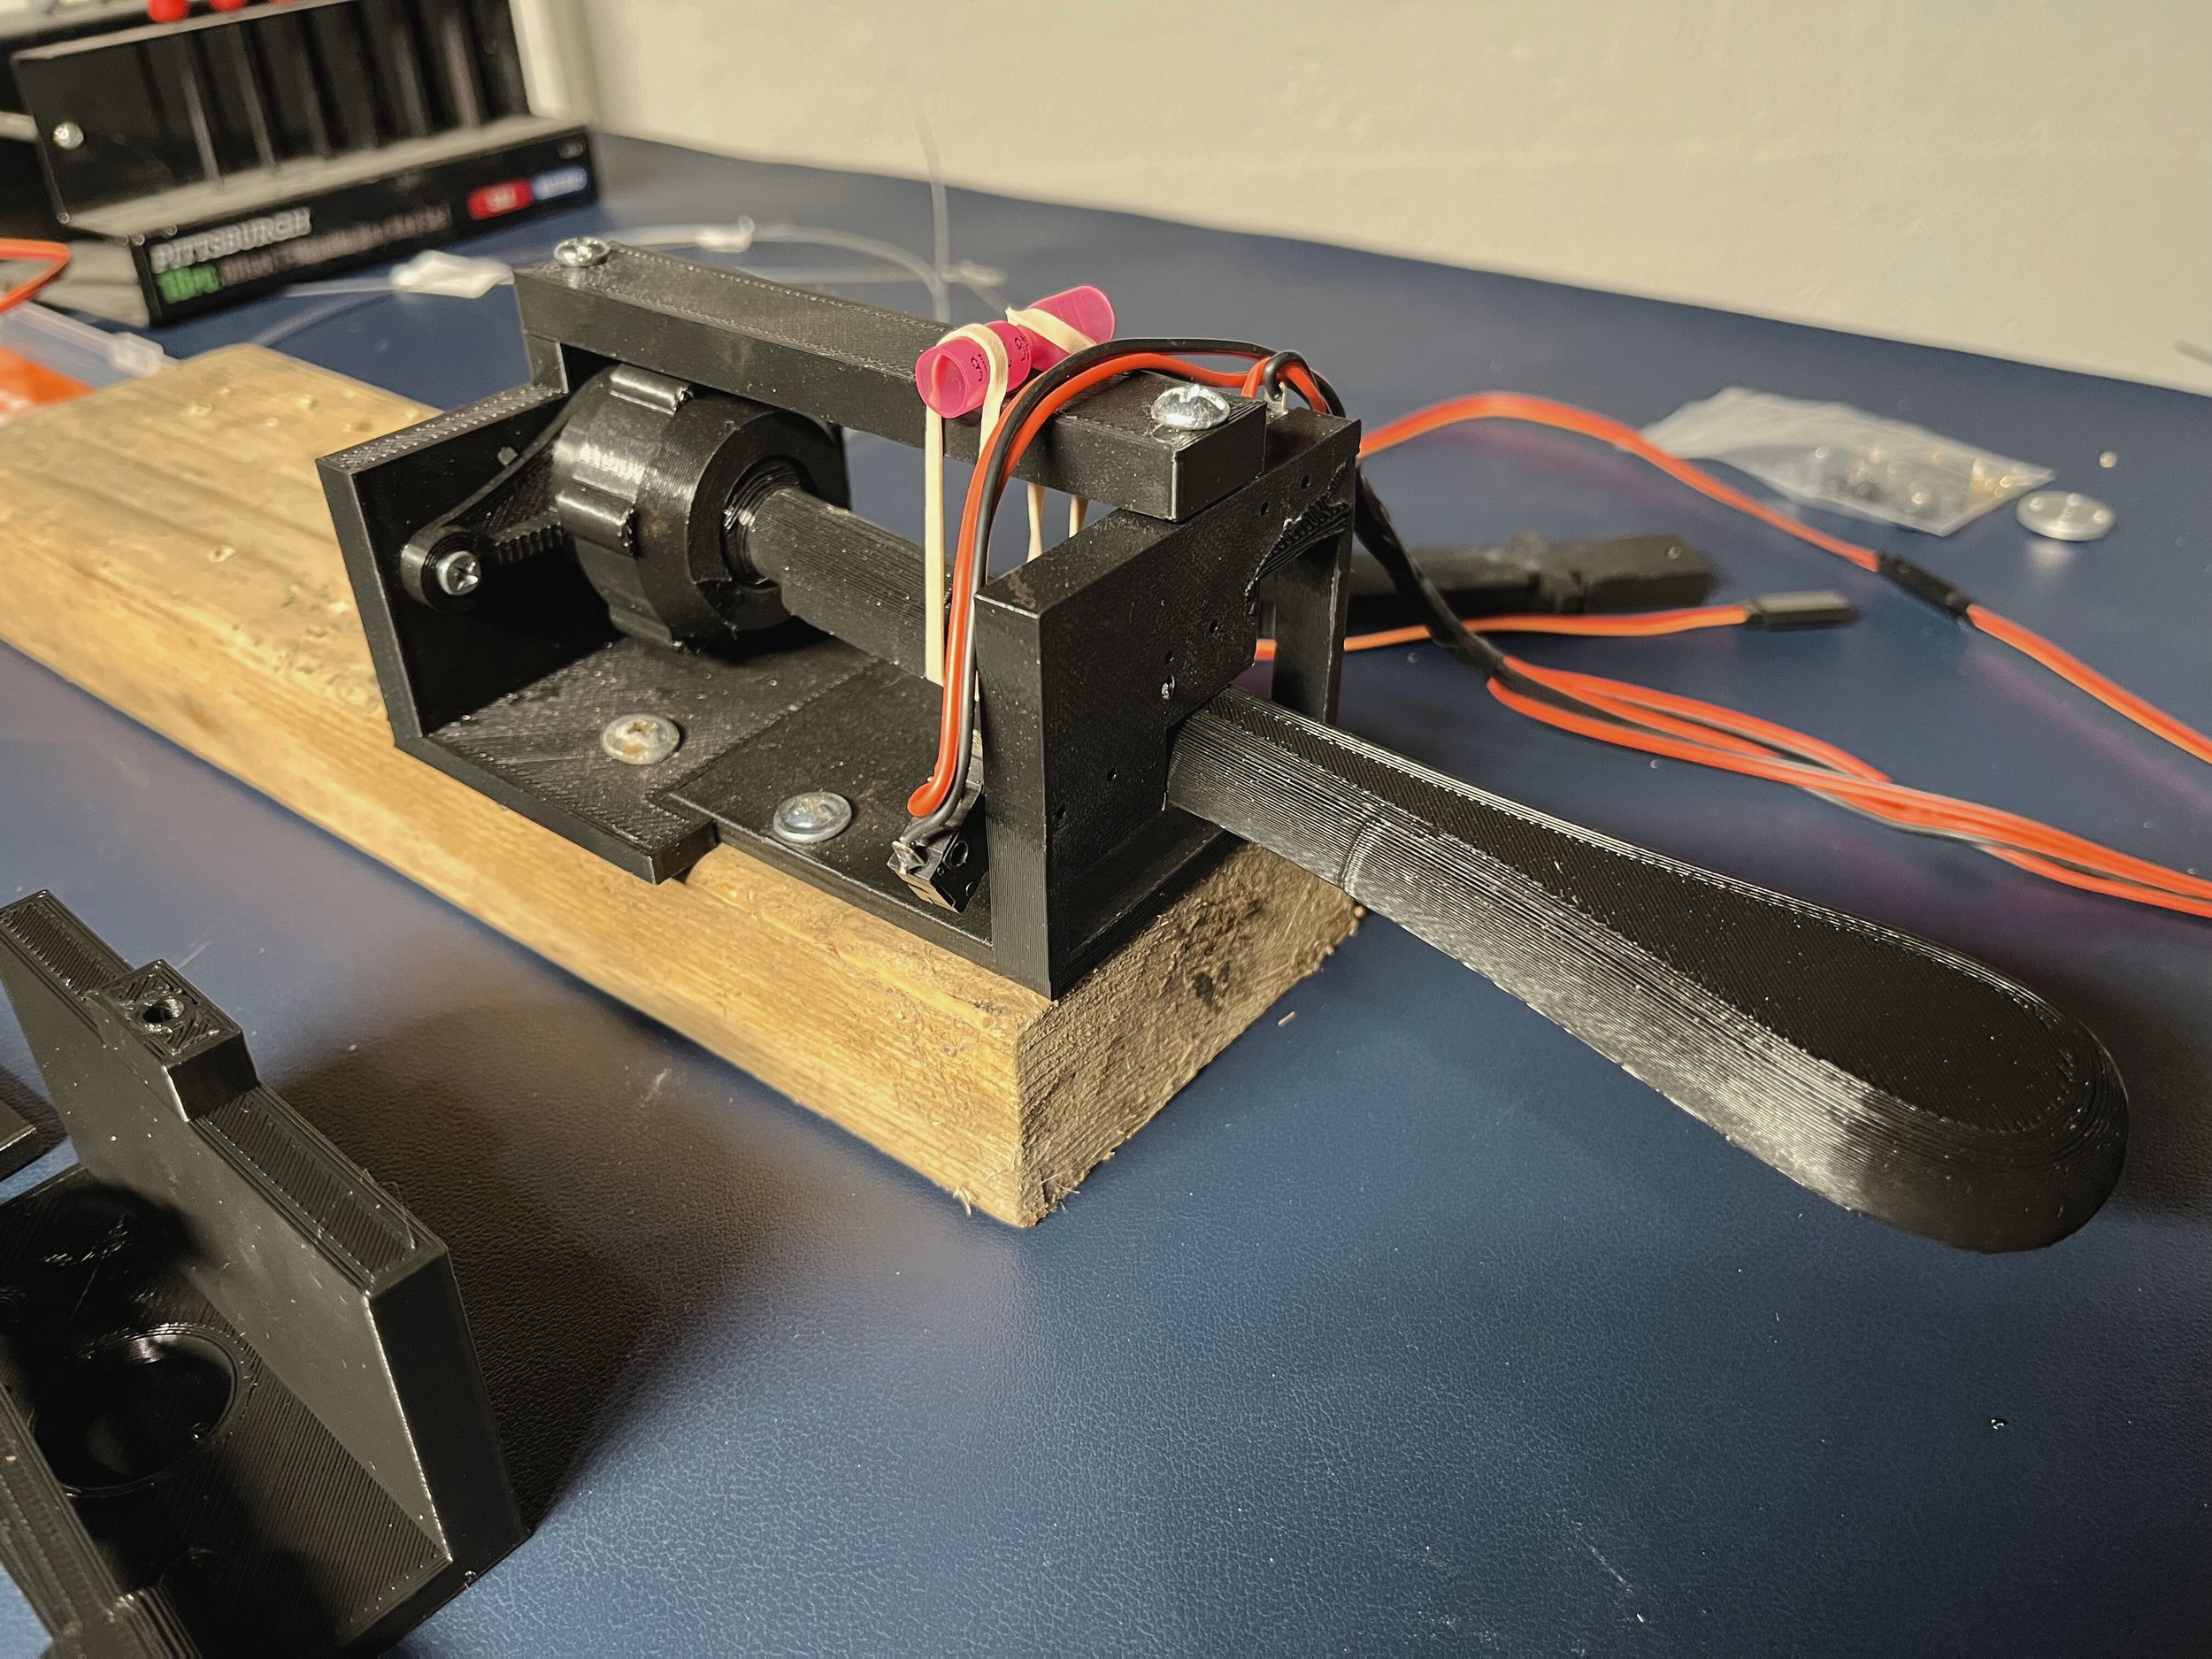
Once I had the shape of the base recreated in CAD, I moved on to figuring out how to actually fit the pedals into the design. The first revision didn’t use bearings, and after swapping out rubber bands for proper torsion springs, it became very clear that wasn’t going to cut it. Fast forward to revision 3 — I’ve now added bearings to the upper and lower horizontal pivots of the pedal base, and the movement is finally feeling pretty smooth. I still plan to add bearings to the vertical pivot points eventually, but for now, it’s officially reached the “good enough” milestone.
Which brings me to the next “good enough”: sensor switches. Right now, I’m using microswitches to detect each pedal position (flat, natural, and sharp). Multiply that by seven notes and you end up with 21 microswitches. Fun times.
The tricky part was positioning them just right. I needed each switch to activate as soon as the pedal enters the “notch” for a specific pitch — not after it’s fully in place. Otherwise, the whole thing would feel laggy and unresponsive.
The downside of all these switches? Wiring. So much wiring. I’m using a breakout board to transition everything into a ribbon cable, which helps clean things up a bit, but it’s still a bit of a spaghetti factory under the hood.
Here’s a close-up look at the current solution. The flat and natural positions work best with roller microswitches paired with a small notch in the pedal mechanism. For the sharp position, however, the wider notch opening required a different approach — so I switched to using a standard metal bar-style microswitch, which has proven more reliable in that configuration.
You can also see the torsion springs in place, along with the lower bearing holders that are helping everything move more smoothly.
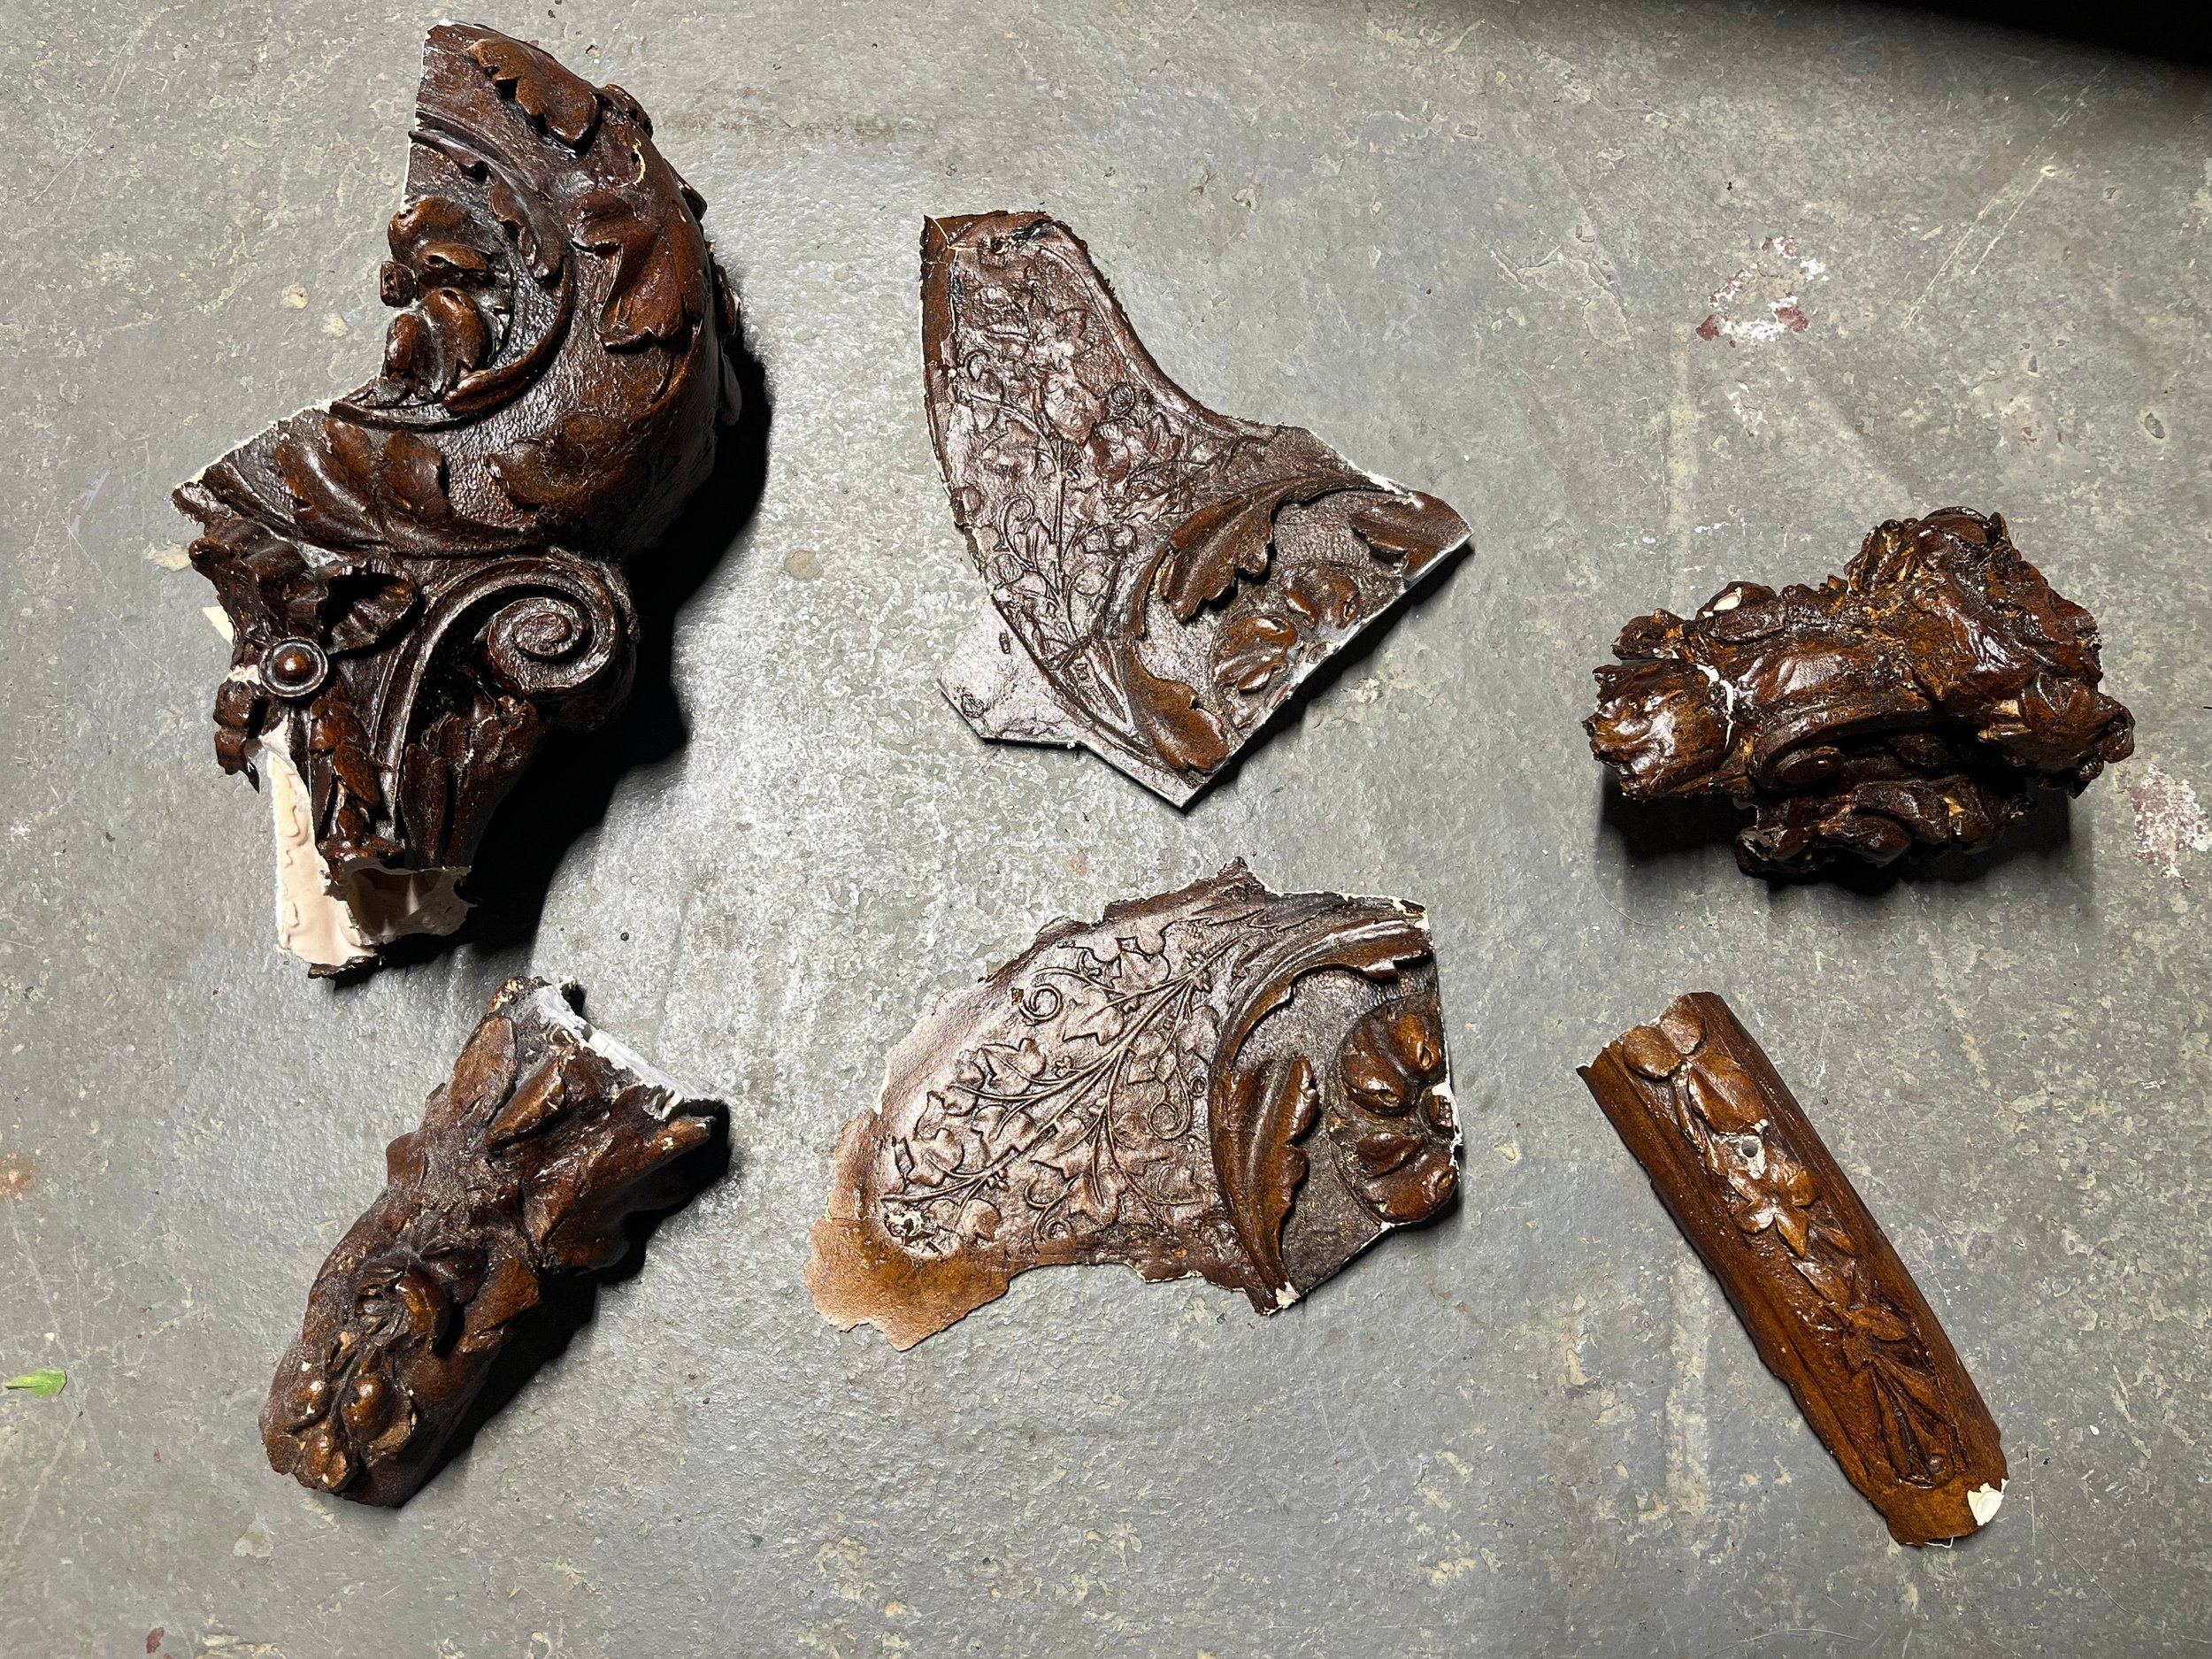
The first step was removing the decorative carvings and trying to keep them as intact as possible. I’ve got a plan for those — but more on that later.
Once I stripped the carvings off the neck and column, I finally got a clear look at what was underneath… and wow. It’s rough. The core is made from a dimensional piece of lumber, and none of it really lines up with what should have been the original design. So that’s neat.
To move forward, I’ve decided to take a hybrid approach to rebuilding the structure.
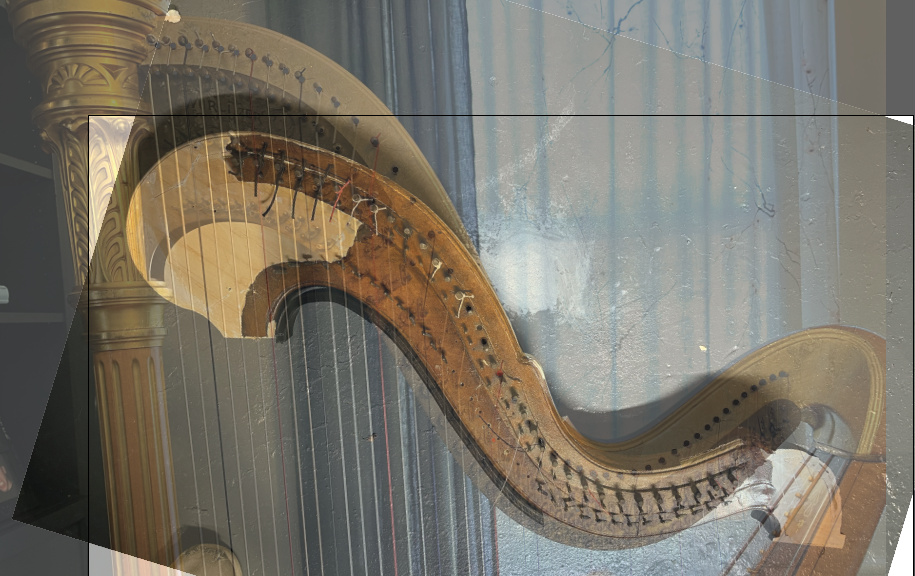
Model AA neck overlaid onto the original instruments neck.
Just because I think it’s interesting — here’s a comparison of the two necks overlaid on top of each other. It’s a cool way to see how the shapes differ and where they align.
Normally, harp necks aren’t exactly what you’d call “quick release” — but that’s exactly what I needed in this case. Since the column isn’t original and the neck angle block is more wood filler than actual wood, I decided to keep things simple and bolt the neck on for now. It’s a practical choice while everything is still in flux and gives me the flexibility to make adjustments as I go.
The next phase of development brought me to the pedal controller system. Unfortunately, this iteration proved to be a learning experience rather than a success.
In my enthusiasm to create something innovative, I designed what I thought was a clever ball and socket joint for the pedal mechanism. The joint did indeed work - while it provided the intended range of motion, it came with an unexpected and problematic side effect: it allowed the pedal to rotate freely.
I'm currently back at the drawing board, redesigning the pedal mechanism with a more traditional approach that constrains movement to the intended axis while still providing the reliable positional feedback needed for the electronic control system.
I knew a lot of the action was missing from this 1700s harp, but I definitely wasn’t expecting to find butter knives being used as replacement pedals! It gave me a good laugh before I got to work.
Our 3D printer couldn’t handle printing the entire base as one piece (looks like it might be time for an upgrade). To work around that — and to make revisions faster — I broke the base into four separate sections. I also added extra mounting holes so each piece can be securely attached to a wooden support base during testing and assembly. It’s a bit more modular now, which has actually made tweaking individual parts a lot easier.
And here it is — the final base revision! The current version is printed in four separate PLA pieces, but I’ve sent the file off to be printed in one solid piece of ABS on a large-format printer for added strength and durability.
Now, let’s have the honest conversation: microswitches aren’t a long-term solution. Do they work for this prototype? Absolutely. But I’m not going to pretend they’re the final answer. I’m already thinking about a better approach — likely using rotary encoders to track pedal angles more precisely. That would eliminate the mechanical wear issues and alignment quirks I’ve been juggling.
It’s time to wrap up this phase and shift focus to the action components in the neck. There’s still a lot to explore here though, and this base will serve its purpose as a solid proof of concept. In the long run, I’d still like to print a mold and make this part out of carbon fiber — but since this won’t be the final solution, I’m holding off on that for now.
Take a look at this instrument — while it’s gorgeous at first glance, the illusion starts to fall apart (pun fully intended) the deeper you go.
Here are all the pieces that were removed from the neck and column. Some of them are in surprisingly good shape, and others… not so much. I’ve kept everything organized for now, and I’m planning to reuse or reference as many of these original decorative elements as I can in the next phase of the build.
Since the world is my harp-based oyster, I’ve decided to use one of my all-time favorite instruments as the design foundation for the OpenPedal harp: the Wurlitzer Model AA. It’s a petite pedal harp, and I specifically chose it because I really love how it functions and sounds. Honestly, the smaller size makes it a bit more manageable for prototyping too.
The first step was photographing both the original neck and the Model AA neck, then tracing them in CAD to get accurate outlines. Once I had those shapes mapped out, I added the tuning pins and bridge pins to the model to see how everything lined up.
Here’s the first revision of the combined shape — using the original instrument’s outline along with the tuning pin layout from the Model AA.
Here’s a slim version giving me (hopefully) plenty of space for the electronics to live.
Once I had a rough draft of the neck ready, I sent the file off to SendCutSend to have it cut from high-grade birch plywood. I chose plywood for now to help keep costs down during the revision process. Once the design is finalized, I plan to switch to maple or a more traditional tone wood.
Now we get to the fun part — laying out the electric motors and starting to figure out how to best tension the strings. To keep things simple, I’m starting with just a few strings to test the concepts. One of the first things I noticed is that the string hole spacing on the soundboard is wildly inconsistent, which will definitely need to be addressed to help with proper alignment.
As for string adjustment, the current servos I’m using are just a bit too large to comfortably fit within standard string spacing — especially compared to modern harps. So I’m experimenting with different motor designs and layout solutions to help reduce that spacing and make everything fit more cleanly.


